Table of Contents
If you are looking for a way to add privacy, delineate an area or offer protection from the hillside behind your backyard without sacrificing style and beauty, building a stone wall is just what you need.
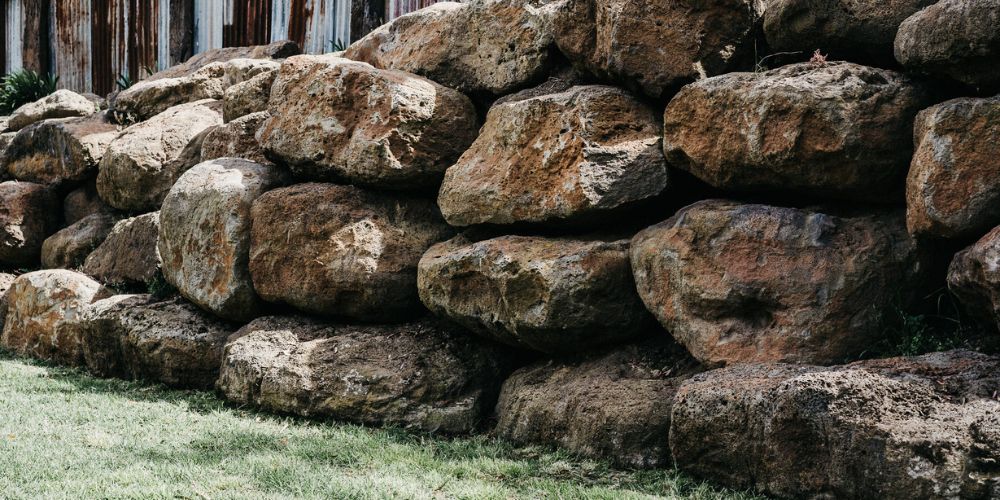
Stone walls blend into nature beautifully while adding permanence to any landscape design. They also have many other uses such as acting as barriers between sections of land creating spa settings introducing another dimension in garden designs. Keep on reading to know how to build stone walls.
How to Build a Stone Wall
Step 1 – Make sure the footing is ready.
If you want your walls to stand the test of time, then they must be well-prepared. A good way for this task would start with identifying a trench below the frost line and two feet wider than the wall’s width. Next, place landscape fabric overlapped 12 inches at seams on top before adding a six-inch layer of ¾-inch stone; tamp each section in between plates using a plate compactor.
After you have excavated your trench and the footing is at an appropriate depth, make sure to add more layers of material. The last layer should be about 8 inches below grade level if it’s a walkway or ground cover that will be walked on often (i.e., not for erosion control). Beyond each end of a straight wall section, drive two stakes with equal spacing from one another as measured by the width of the wall – this helps stabilize those sections during construction!
Step 2 – Work on the Base Course
Construction usually begins with the foundation. You want it to be as solid and sturdy as possible, so take your time selecting a location for it that is well-drained but not too wet or high in elevation. One of the keys when laying out your foundations is getting them level!
It would also behoove you to make sure they are square – this will ensure stronger walls later on down the line (pun intended). Connecting stakes at even intervals just above grade should help keep everything straight while constructing each course one stone at a time until completed.
Fill the space between these stones with smaller ones, set flush and level to match them. Finish off this course by laying on a thin layer of mortar at its top.
Step 3 – Time to build your stone wall
You can use this technique to add some zest and creativity when constructing a dry-stone wall. Start by positioning the line higher up on the stakes, then start building from one of its corners. Dry fit each stone first; make sure that you stagger those vertical joints, so none are directly next to another – also, be aware that outside faces just touch your starting point’s line before moving off in different directions.
When removing a stone, spread mortar on the wall and tamp it in with your mallet. Make sure to clean any excess away before you press the stones into place.
Step 4 – Use pencil wax when marking stones to cut
To cut the stones, you may have to start by marking off sections with a wax pencil. (For this wall the goal is tight joints less than 1 ½ inches wide.)
You will need a 3-inch carbide chisel, a 3lb hand sledge and safety glasses to craft precision cuts.
Step 5 – Time to cut the stones.
This is the easy way to score and break a stone. Put the marked stone on an upside-down container, like a bucket or canister. Set your chisel’s carbide tip against the line drawn in wax pencil onto a fresh rock where you will want waste to be removed.
Strike it once with force! Then reposition so that half of the blade rests firmly at the endpoint of this scored area while the other hand strikes again. Then repeat until the desired effect is achieved.
Step 6 – Don’t forget to tool the joints.
It is crucial to keep the wall of a dry stack stone retaining wall from shifting. You can do this by applying wedges at the base course on both sides and misting it with water during work, keeping it moist for longer curing periods which would otherwise cause cracking when left out in windy or hot conditions.
A brick trowel is a valuable tool in the process of laying bricks. When using this type of metal or plastic edged trowel, you’ll want to make sure your workspace has some backing for it so that there are no foot injuries involved when handling and lifting heavy pieces.
To keep things organized on-site, measure out each wedge with 6 inch high walls and 12 inches broad base before backfilling. Otherwise, you could end up going around more than once if they’re not laid perfectly straight from the beginning!
What To Keep In Mind When Building Stone Walls?
Stone walls make for a classic look and are relatively easy to build. For this task, you’ll need flat stones or cut flagstones called ashlar. Ashlar is easier to stack together since they’re already flat on one side so the mortar can bind them in place– unlike fieldstone which is often irregularly shaped with both sides rough-textured from years spent lying outside exposed to wind and weather elements like rain water erosion.
To create the perfect aged look for your home, use plants to add a natural touch. You can pack in soil and plant wherever gaps are large enough on cut stone walls or holes left by rougher stones that have fallen out over time. These spaces don’t need to be big but should not compromise the integrity of the wall either.