How To Build A Rock Retaining Wall?
Table of Contents
I have built many retaining walls in my time, and speaking from first hand experience, its not for everyone. Here’s my guide on building a rock retaining wall, for anyone.
Building a rock retaining wall in my own backyard was both a challenging and a bloody rewarding experience. When I first stared at the slope eroding away with each rainfall, I knew I had to take matters into my own hands, being an expert in excavation and retaining walls, had me watching the erosion with a close eye.
The vision was clear: a sturdy, beautiful rock wall that not only served a functional purpose but also added a bit of beauty to the landscape. The journey was filled with sweat, a few corrections, and countless learning moments, even though I have built many retaining walls in the past, I learn something every time.
As I sit back now and have a squiz at the fruits of my labour, there’s a surge of pride, mixed with relief, knowing that the land is now held securely in place. Let me share with you the steps, the trials, and the triumphs of building that rock-solid guardian of my garden.
Here’s some information on rock retaining, and why you may need one.
Retaining walls are built to hold back the soil from erosion and create a transition from one level of the earth to another. Retaining walls are well-engineered structures that strengthen and maintain loads of saturated soil and prevent it from breaking away. These walls are commonly seen as concrete sleeper retaining walls, but can take many many forms, personally, our company has built retaining walls from just about any material you can imagine.
Designed differently using diverse materials, retaining walls are not only structured to hold back the ground but can be created to remodel your outdoor living spaces, thereby improving the overall aesthetic value of your property, as they have been used throughout history. I have built many retaining walls, that were used as more of a feature wall than actually a retaining wall, they can serve a double purpose, and the site of a beautiful rock wall in your garden simply looks amazing.
Designing the retaining walls depends on the purpose and susceptibility of the soil. While different materials like carefully arranged masonry blocks, reinforced concrete, timber panels, rocks/stones, and boulders are employed to create retaining walls, rock retaining walls are the most consistent to fit flawlessly into any style to display elegance. For example, we recently built a rock retaining wall, from sandstone that was basically garbage, a construction site didn’t want the sandstone boulders on their dig for their new development, so we built a beautiful sand stone wall out of them.
Engineering a successful rock retaining wall project can be time-consuming and comparatively a more considerable investment. Still, the stone being the most sustainable material, these walls are incredibly sturdy and survive longer. Natural rocks of different sizes and shapes are employed to structure rock retaining walls. These walls are resistant to weathering and erosion and do not easily collapse and wash away.
Rock retaining walls are built with a specific purpose to restrain tons of soil or other materials from breaking away; the pressure can be immense; it is vital to have significant knowledge and related experience to build these rock retaining walls.
Retainer walls have been seen constructed out of a huge range of materials such as timber sleeper, sleeper retaining walls, treated pine sleeper retaining walls, rock, concrete and steel, all using appropriate retaining wall fixes for engineered strength.
Let me dive directly into understanding which materials and methods are employed and how can you construct a rock retaining wall:
Methods of Building Rock Retaining Walls
Our team of retaining wall builders understand the process, if with a machine or even by hand.
Usually, building rock retaining walls is undertaken in two standard methods. The first one, where the wall is constructed using concrete and mortar; the other method is dry-stacking; here, the rock retaining wall is built without using concrete and mortar.
The benefit of choosing to build mortared walls is you need not invest much time and effort in correcting the shapes of the stones to fit perfectly with one another to erect a well-structured fence; the mortar manages to fill the gaps and holds the beautiful rocks together. However, it is vital to provide suitable drainage to ease the unwanted pressure, failing which a well-built wall can get compromised over time. From experience, if there is not adequate drainage, you may have problems down the road.
While a dry-stack rock retaining wall has no mortar and naturally provides better drainage to allow the water to pass through it and ease hydrostatic pressure, it is comparatively time-consuming. Engineering a dry-stack rock retaining wall needs improved planning and skilled craftsmanship. Skilled craftsmanship will ensure better-fit and well-chosen stones that bond with one another in an interlocking framework with a firm base to erect a more muscular retaining wall to endure the pressure from the backfill.
Although a time-consuming method, a dry-stack rock retaining wall, put together correctly, can survive for a long time. These retaining walls have the affinity to flex with the moving soil beneath, unlike mortared rock retaining walls that are stiff and can crack fast with the moving ground slightly. Also, a dry-stack stone retaining wall will not break away as it does not depend on mortar that wears out over time.
Before planning to build a rock retaining wall, it is essential to consult a professional and ensure you are not damaging the under-soil utility lines, we ALWAYS check our dial before you dig, before we start construction on a wall.
How To Build A Rock Retaining Wall - A Step By Step Process?
Before building a rock retaining wall, make sure to know about the locally applicable building code rules and regulations governing retaining walls. Some zones require approval from the authorities after the concerned officials have duly inspected the site where you intend to build a retaining wall.
If you’re in Bulleen or Fairfield and considering building a retaining wall, it’s particularly important to engage experienced retaining wall builders familiar with the local regulations.
The essential equipment/tools needed to build a rock retaining wall include:
- Pick mattock
- Single-jack sledgehammers
- Shovel
- Double-jack sledge hammer
- Pick/mini-pick/rapid-digger – helpful in digging in tight spaces
- Buckets or canvas rock bags for transporting crush/gravel
- Drag slings
Below is the list of optional tools that you may need during the process:
- Grip-hoist rigging setup for major rock projects
- Carbide-tipped stone-shaping hammers and chisels
- Rotary hammer drill with carbide-tipped auger or chipper bits (gas-powered, or electric with portable generator)
- Feathers or pins and wedges – Must be sized to fit your drill bit.
Ensure to have more stock of rocks than you think you require. The rocks you procure must be of different sizes and shapes to manage the loose gaps and strengthen giant rock stability. Some smaller stones/rocks will be required to fill up the gaps and crevices between the more enormous rocks if a dry-stack rock retaining wall is created.
Once you are done with gathering all the material and the tools required to build a long-lasting dry-stack rock retaining wall, the following step by step process needs to be followed:
Step 1: Surveying the Site
I always determine the location and the dimensions of the proposed rock retaining wall. Determining the wall’s width and the inward angle, called batter, to be incorporated is crucial to have a better mass controlling potential of the wall. You may mark the proposed dimensions with a string line to ensure you stay on target.
Step 2: Organizing the Rocks
Segregate the rocks roughly by shape, size, organize and put them separately in distinct piles near your proposed wall site as required for building your retaining wall.
Use the flattest rocks to lay the wall’s foundation to give it a firm base to erect the rock retaining wall correctly, the good-looking, more comprehensive, and smoother rocks to be placed at the top of the wall to give a flattering look.
The uniformity and reliability in the rock retaining wall can be well-maintained when the rest of the rocks with odd dimensions, shapes, and sizes can be mixed and placed with smoother and regular rocks for an improved finish. If required, you can manage to smoothen the peaks and other odd formations of the rocks for a better fit construction with a maul and brick chisel.
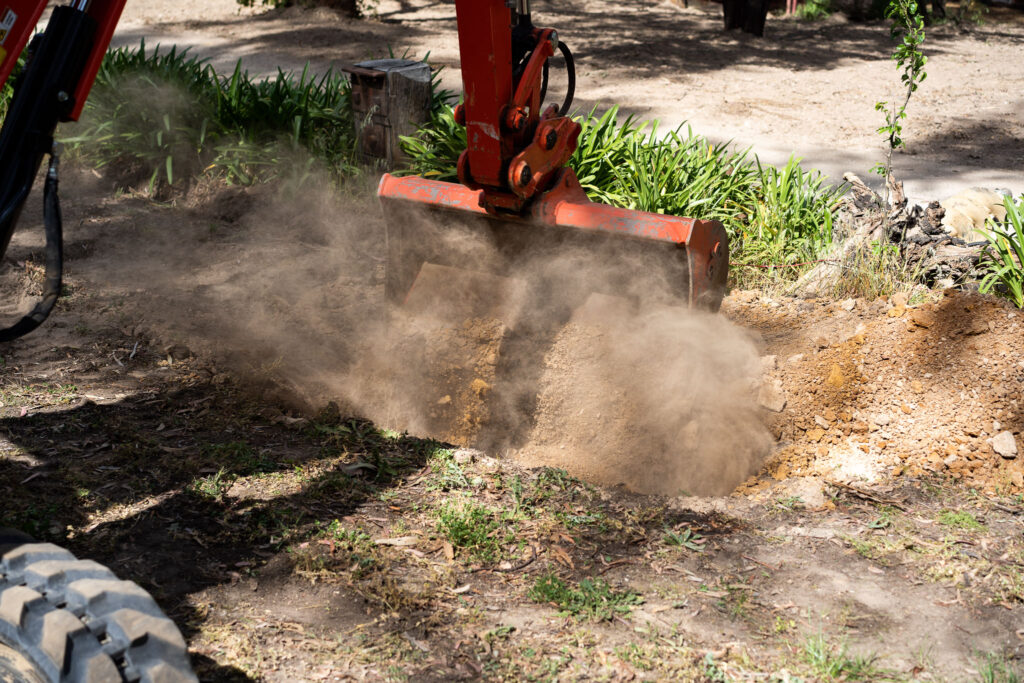
Step 3: Excavating The Area
Keeping in mind the stability and durability of the rock retaining wall with a proper batter, dig out into the soil from the string moving back towards the slope to have a smooth foundation, excavate about 12 inches into the ground, ensure to make a smooth channel all the way along so you can even have a gravel base to start laying down the first layer of rocks that should be beneath the soil.
Now excavate into the soil, making a vast space as required, 6-12 inches between the backside of the wall and the slope meant for proper drainage so that the water is drained out quickly without exerting unwanted pressure on the retaining wall.
Step 4: Preparing the Wall Base
After you are done with making an even channel, spread the first coarse gravel to fill the trench and ensure it is smoothened with a rake to make it completely flat. Now tamp/pack the coarse gravel carefully using a hand tamp or a hired power tamper. To make it more compact, add a layer of coarse sand, around 1-inch, over the tamped gravel. Use a short 2×4 board to level the sand and make it smoother and flat.
Step 5: Laying the First Rock Layer
Start with laying the corner rocks first, and continue to set the largest ones throughout the base of your retaining wall. Place the rocks firmly to have a stronger foundation as the base layers will tolerate the heavyweight of the rocks above them. Once you have laid the second course, fill center gaps with smaller pieces.
While you work on laying the first course, you may remove or add coarse sand under each rock, as may be required, to make each rock of the base layer firmly set. Continue laying the first course till you are done up to the end of the retaining wall.
Step 6: Laying the Second Rock Layer
While laying the second layer, pick the rocks that will bond the first joint of the bottom sequence; while laying the second course, start about half an inch further inward, leaning backward to create a stable retaining wall to hold back the soil properly. Intermittently laying single rocks on each layer that runs the retaining wall’s full depth will add strength to your wall.
Place the rocks in a way to bond properly with one another, exhibiting a better coherence. Once you are done laying the second course, ensure to fill up the leftover gaps with smaller rocks.
Step 7: Back-Filling The Wall
After you have laid down the first two layers of rocks on the smooth foundation set in the excavated soil, it is vital to plug with drainage gravel the space created between the slope and the wall. Using a hand tamp, thoroughly rake the gravel flat and make it completely level and smooth.
Step 8: Laying More Courses
Using the technique followed while laying the second layer, consider adding 1/2 inch of batter, laying the third and subsequent courses of rocks, and staggering the joints with the course below. Install “Deadman” (long rocks that reach back into the slope) every 6 -8 feet around the entire wall to help bond the wall into the soil at its back. You may need to dig into the slope to ensure each “Deadman seat level front to back. Dig into the slope, as required, so the stones sit level front to back.
Continue fitting the rocks in the same manner, installing the layers until you are one course away from the retaining wall’s planned height.
Step 9: Laying The Final Course To Make Top Of The Wall
The final step to building the rock retaining wall will need plenty of patience, and you will have to more carefully choose the smooth and best-fit rocks for the cap (the final course) and make it nice-looking in addition to being sturdy. Choose much more prominent and rectangular rocks for this final layer, ensure a suitable placement and secure the stones, so make structure your primary focus. Unlike other layers of the wall, avoid lengthy joints in the final layer to endure traffic. To complete the top of the wall, make sure there is no shaking.
While placing each rock during the construction of the entire retaining wall, ensure there is almost no wobble. To prevent the wobble, make use of small and flat rocks as shims for a better fit of rocks while laying the courses

Some Essential Tips To Build A Rock Retaining Wall
Retaining walls are distinct and have to function dually; they not only have to support themselves but survive the pressure to retain the soil and other material at their back. I have built hundreds, and don’t underestimate mother natures forces.
So, the construction of these walls needs extra care and involvement in addition to investing time and material. Here are some essential tips to follow while erecting a rock retaining wall:
- Pick high-quality rocks to have substantial strength to resist the burden being applied by the weight behind the wall.
- The foundation will determine the wall’s overall strength, so it is always vital to build a sturdy and compacted foundation since the heavyweight of the rocks that will form the retaining wall will exert heavy pressure on the foundation over time.
- Ensuring proper drainage will decrease the lateral pressure of soil or wet gravel on the wall, resulting in minimum wall collapse chances. So, to retain the wall’s structural integrity, it is crucial to have plenty of drainage.
- Prevent the rocks from wobbling by using shims. While constructing the structure, ensure each rock you place is set firm and, if required, use shims to lay rocks steadily.
The Final Thought
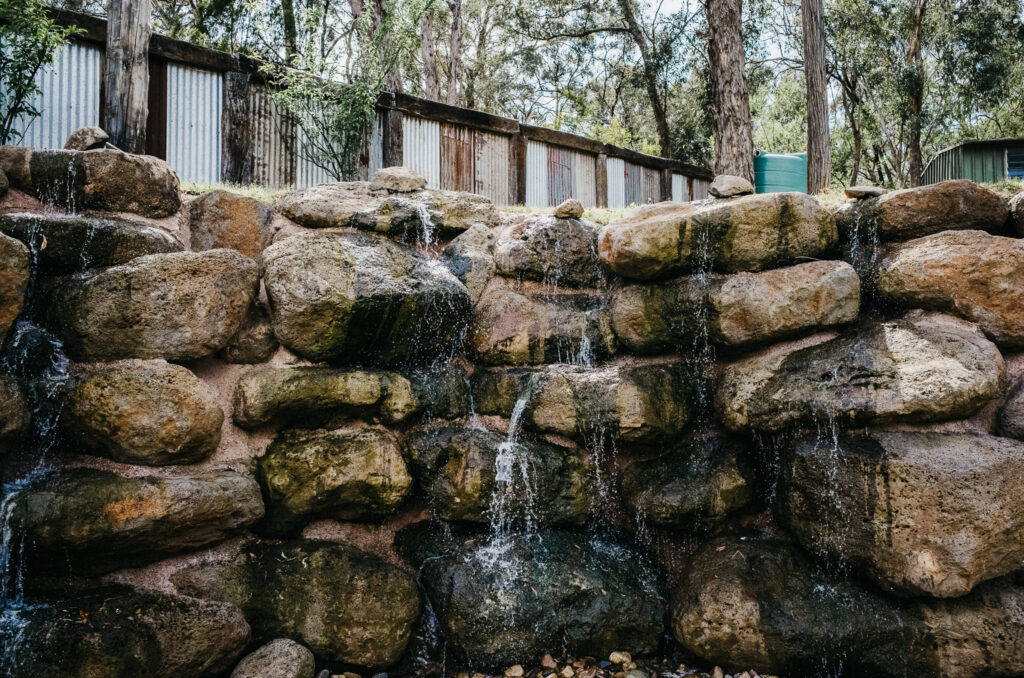
Structuring rock retaining walls can be time-consuming and involve a heavy investment of labor. The walls carved out of high-quality rocks are not only most sustainable, extremely sturdy to survive a much longer time but fit perfectly into any landscape to display elegance. A well crafted rock wall can light up your back yard and turn you into the envy of the neighbourhood.
This guide is for a smaller rock wall, large rock walls require professionals and heavy earthmoving equipment.